

Appearance
App & Github Configuration
Every Frappe site on Espresso is built from one or more apps — each app points at a Git repository and a branch or tag. You manage apps from the Create Site or Edit Site form under the Apps section.
Click + Add from Catalog to open the Add App dialog. You can add apps three ways:
- App catalog — install from Espresso's maintained list of public, popular Frappe apps.
- GitHub — pick a repo from a GitHub account you have connected.
- Manual Entry — paste repo details yourself (useful for private repos or one-off URLs).
For the GitHub tab to work, connect GitHub once from Account Settings.
Overview
- Add an app to a site — open the Add App dialog from Create Site or Edit Site.
- App catalog — browse Espresso's maintained list and pick a version.
- GitHub — select a connected account, repository, and branch or tag.
- Manual Entry — enter app name, URL, branch, and optional access token.
- Connect GitHub from Account Settings — install the Espresso GitHub app on your account or organization.
- Edit or remove apps — change branches or drop apps before the next deploy.
Add an app to a site
Apps are configured on the Create Site or Edit Site form — the same Add App dialog is used in both places.
- Scroll to the Apps section.
- Click + Add from Catalog.
- Choose a tab — Free & Open Source Apps (the app catalog), GitHub, or Manual Entry.
- Complete the two-step flow (pick an app or repo, then choose a branch or tag).
- Click Add App (or save the site form) to include the app in the site's configuration.
Apps are not installed until the site is deployed. On Create Site, the first deploy runs when you click Create Site. On Edit Site, save your changes and use Trigger Release (or wait for a webhook) to apply app changes.
See Site Management for the full create and edit workflows.
App catalog
Espresso maintains an app catalog — a curated list of public, popular Frappe apps you can install on any site without hunting down repository URLs yourself. The catalog appears in the Add App dialog under the Free & Open Source Apps tab.
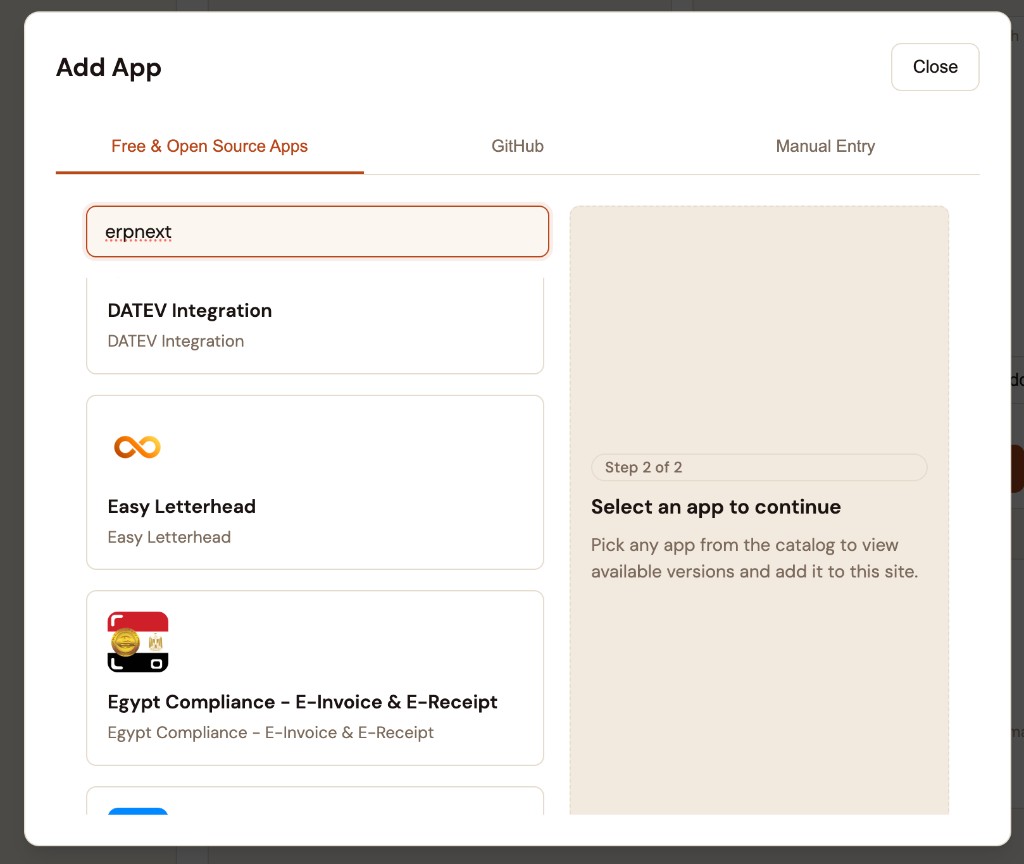
Each catalog entry includes:
- App name and icon — the Frappe app identifier (e.g.
erpnext,hrms,lms). - Short description — what the app does.
- Source repository — the public GitHub repo Espresso clones at build time (pre-filled for you).
- Available versions — supported branches or release tags you can pick for your site's Frappe version.
What is in the catalog
The catalog covers the apps teams most commonly deploy on Espresso, including:
| Category | Examples |
|---|---|
| Core Frappe apps | ERPNext, HRMS, LMS, Education, Payments, Wiki, Insights |
| Integrations | E-commerce connectors, payment gateways, messaging (Twilio, WhatsApp), shipping |
| Regional & compliance | Country-specific accounting, e-invoicing, and localization apps |
| Industry extensions | Healthcare, property management, nonprofit, and other vertical add-ons |
Espresso adds and updates catalog entries over time as the Frappe ecosystem grows. If an app is public on GitHub but not yet in the catalog, use the GitHub or Manual Entry tabs instead.
Add an app from the catalog
- Open Add App and stay on Free & Open Source Apps.
- Use the search bar to filter by name (e.g.
erpnext,hrms,datev). - Click an app card in the list.
- On the right, pick the version (branch or tag) compatible with your site's Frappe version.
- Confirm to add the app to the site.
Catalog apps use public GitHub repositories. You do not need a connected GitHub account or access token — Espresso already knows the repo URL and which versions to offer.
Start with ERPNext
Most sites need ERPNext as the base app. Add it from the catalog first, then layer HRMS, LMS, regional apps, or integrations on top.
GitHub
Use the GitHub tab to add apps from repositories on a GitHub account or organization you have already connected to Espresso — including your own private Frappe apps.
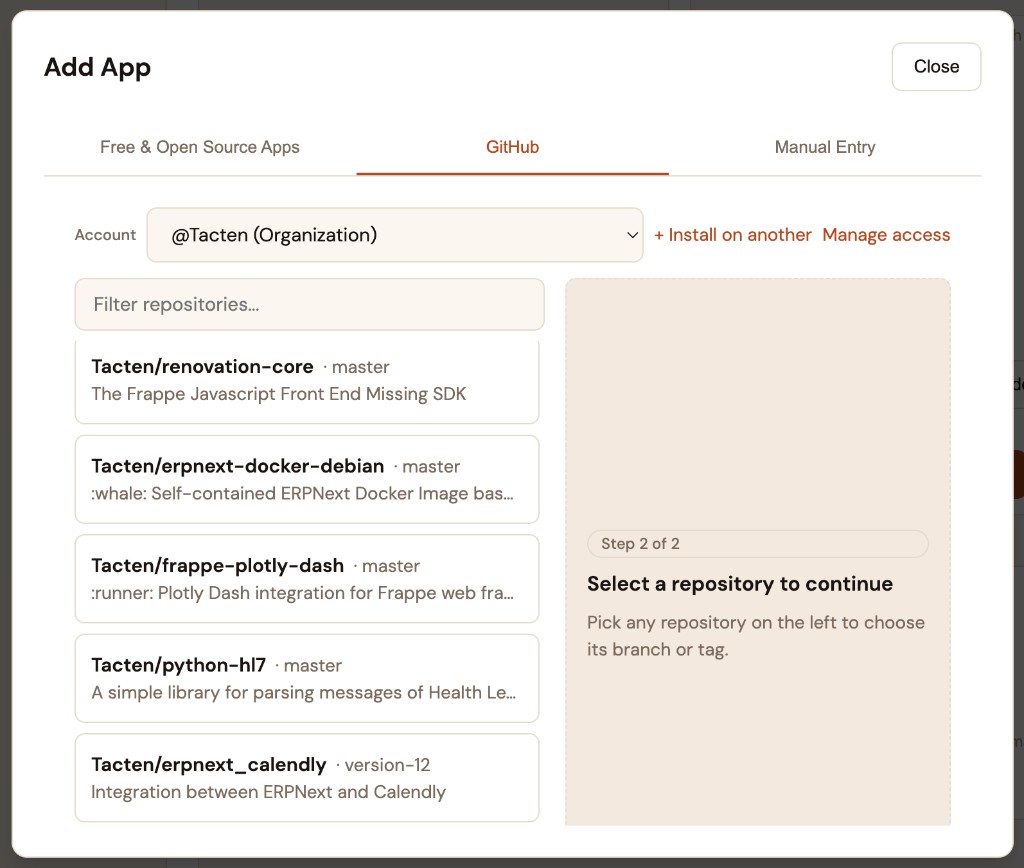
Select an account
At the top of the tab, choose the Account (e.g. @Tacten (Organization)). Espresso lists repositories that account has granted access to.
- + Install on another — connect an additional GitHub user or organization. Same flow as Account Settings.
- Manage access — open GitHub to change which repositories Espresso can see for this installation.
If no account appears, connect GitHub first — see Connect GitHub from Account Settings.
Select a repository and branch
- Filter repositories with the search box if needed.
- Click a repository card on the left (e.g.
Tacten/cirra_360). - On the right, choose the branch or tag to deploy (e.g.
master,version-15,v15.93.2). - Confirm to add the app to the site.
Espresso clones that repo at the selected ref when it builds the next release.
Connect GitHub before you create the site
You can connect GitHub from Account Settings at any time. Doing it before you open Create Site avoids switching away mid-setup.
Manual Entry
Use Manual Entry when you want to add a repo without browsing GitHub inside Espresso — for example, a third-party public repo, a private repo where you paste a personal access token, or a repo you have not connected via the GitHub app.
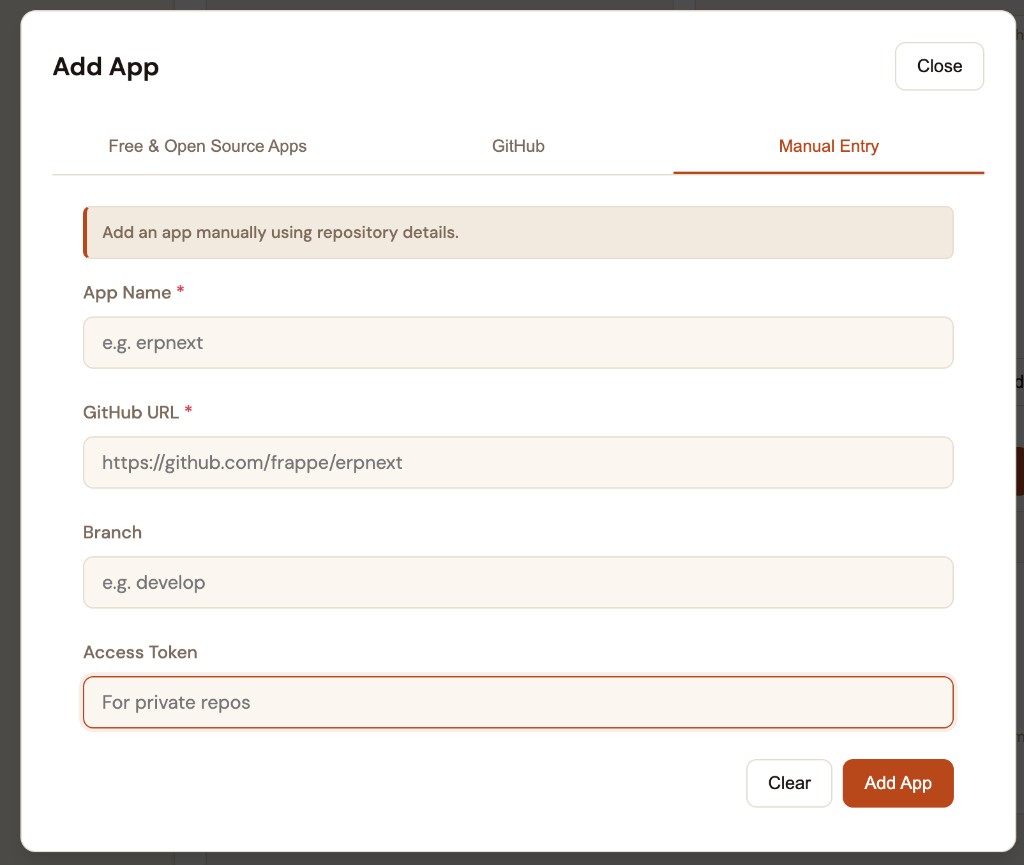
Fill in the form:
| Field | Required | Description |
|---|---|---|
| App Name | Yes | Frappe app name (e.g. erpnext, my_custom_app). |
| GitHub URL | Yes | Clone URL (e.g. https://github.com/frappe/erpnext). |
| Branch | No | Branch or tag to deploy. Leave empty to use the repo default branch. |
| Access Token | No | Personal access token for private repositories Espresso cannot reach through the GitHub integration. |
Click Add App to add the app to the site. Use Clear to reset the form.
For private repos you control, connecting GitHub in Account Settings is usually simpler than maintaining tokens in Manual Entry.
Connect GitHub from Account Settings
Connecting GitHub is a one-time account setup. After it is done, every site under your account can use the GitHub tab in Add App.
- Open Account Settings in the Espresso Cloud dashboard.
- Go to Integrations.
- Under GitHub, click + Install on another GitHub account (or connect GitHub if nothing is listed yet).
- On GitHub, authorize the Espresso app and choose which account or organization to install it on.
- Select repository access — All repositories or only specific repos you want Espresso to deploy.
- Complete the installation and return to Espresso.
Once connected, Account Settings shows each linked account (e.g. @Tacten · Organization · All repositories) with a link to Manage on GitHub.
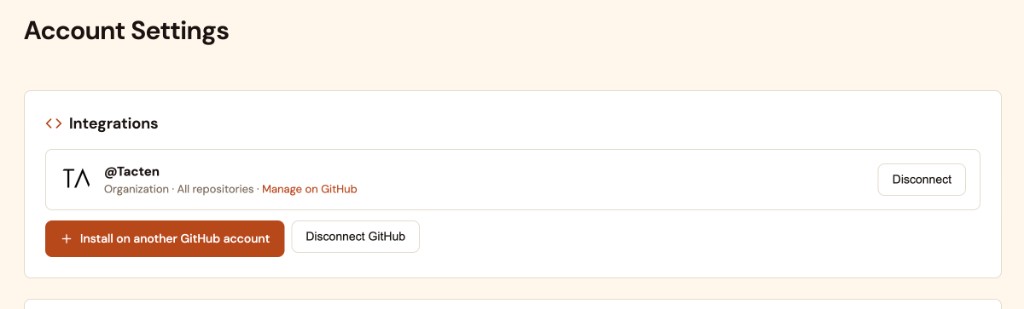
| Action | Purpose |
|---|---|
| + Install on another GitHub account | Link a second user or organization. |
| Disconnect (on one row) | Remove that GitHub installation only. |
| Disconnect GitHub | Remove all GitHub integrations from your Espresso account. |
After connecting, open Add App on any site, switch to the GitHub tab, and pick the account and repository.
Repository access
If a repo does not appear in the GitHub tab, the Espresso GitHub app may not have access to it. Use Manage on GitHub (or Manage access in the Add App dialog) to grant access, then refresh the repository list.
Edit or remove apps
On Edit Site, each installed app appears as a card showing its name, GitHub URL, branch, and status.
| Action | What it does |
|---|---|
| Edit | Change the branch, repo URL, or other app settings. |
| Remove | Drop the app from the next deploy. |
After saving, trigger a release from Site Management to rebuild the site with the updated app list.
To add another app later, click + Add from Catalog and use any of the three tabs again.
Good to know
- Apps apply on deploy. Adding or editing an app updates the site configuration immediately, but the running site changes only after the next successful deployment.
- Catalog vs GitHub vs Manual. Use the app catalog for well-known public Frappe apps — repo URLs and versions are pre-configured. Use GitHub for your own repos after connecting an account. Use Manual Entry for apps not in the catalog or token-based private access.
- Catalog is maintained by Espresso. New public apps are added over time. Missing an app? Use GitHub or Manual Entry, or contact support to suggest an addition.
- Branch or tag pins the build. Each app is built from the ref you select. To ship new code, change the branch/tag (or point at a new tag) and deploy again.
- Release data on app cards. After webhook-driven deploys, app cards may show additional release metadata. Until the first deploy, you may see a note that release data will populate after deployments.
Need help? Reach out at support@espresso.zimplify.tech with your site name and the app or repository you are trying to add.